#
Shrimp Co.
#
Welcome to Shrimp Co.
This is my beginner friendly lab series where you play the role of network administrator for Shrimp Co, a growing company based out of Seattle, WA. You'll start with a single network closet and basic layer 2 connectivity, slowly increasing the size and complexity of your network as the series goes on. Eventually. we'll build up to a large headquarters incorporating several layers of redundancy, dynamic routing, and a basic WAN.
#
Philosophy
Each lab builds on the previous one, reusing familiar devices while introducing new hardware, protocols, and technologies. While some configuration will be pre-existing, you'll be configuring the devices from scratch each time. This allows you to become familiar with the network as you would one you work in, and develop important muscle memory on the command-line.
Who is this for?
Shrimp Co. is designed for:
- Beginners to networking
- IT professionals building foundational knowledge
- Self-starters who learn best by doing
While beginner-friendly, a basic understanding of networking, Cisco CLI, and Linux will be helpful. Labs provide structure, objectives, and tips — but protocol research and command syntax are left to you, just like in the real world.
Helpful references are linked in each lab’s documentation.
#
Before you start
1. Navigate to your ~/containerlab directory and pull the latest updates from the repository with git pull origin main. If you don't have the repo cloned yet visit Getting Started.
2. If you have SecureCRT make sure to upload the .xml file included in the repo for SSH sessions and commands.
3. The Docker management subnet for these labs is 172.20.25.0/24.
To make SSH work:
- Add a static route on your local machine with your Ubuntu host as the next hop
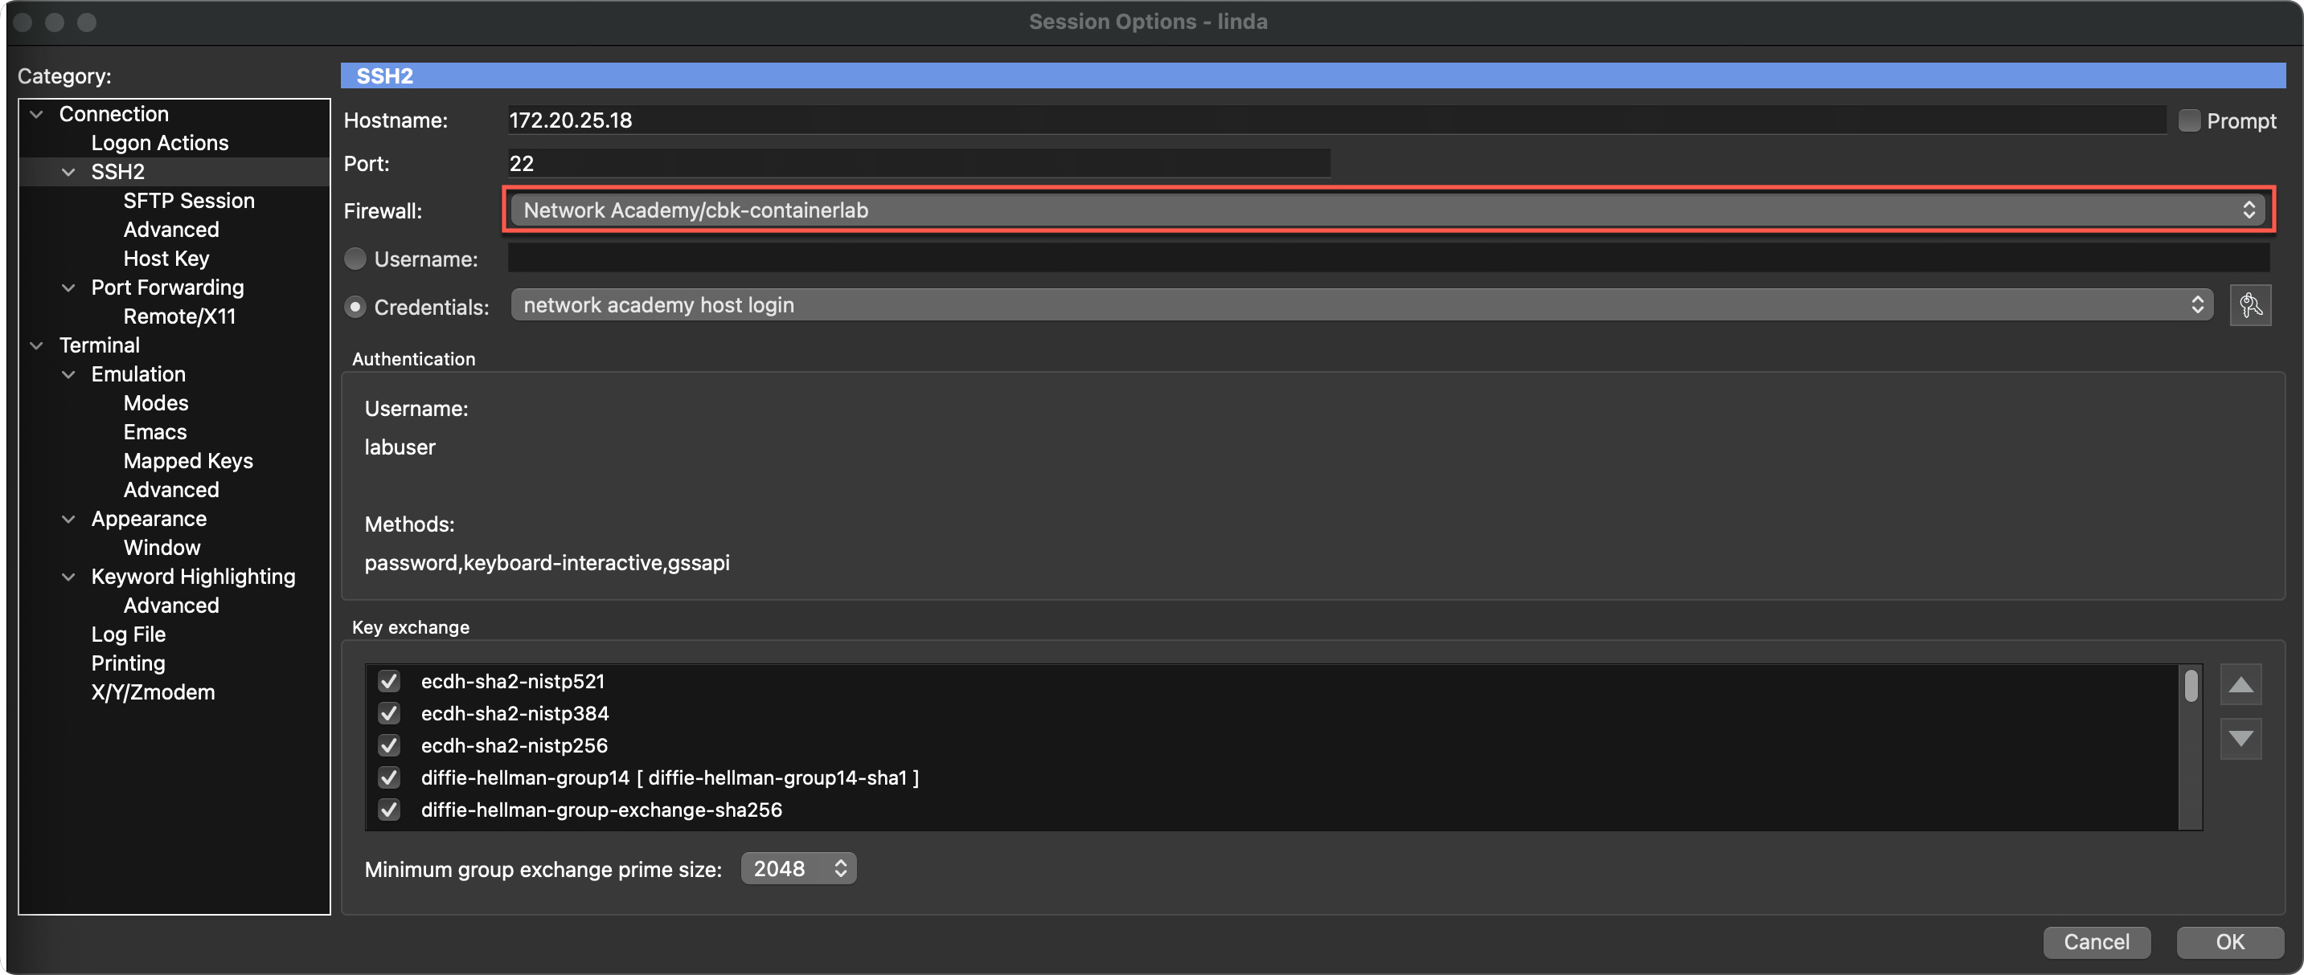
- Or, if using SecureCRT, configure one session as a jump host (see screenshot)
4. Each lab reuses hostnames (like sea-a1-asw1, sea-mdf-r1, etc.), but assigns unique management IPs per device instance. This allows labs to run side-by-side without port conflicts — helpful in multi-user environments.
5. Each device tag has both the Docker management IP address, and the in-lab management IP address. Both will be shown on the device tags on each lab topology.
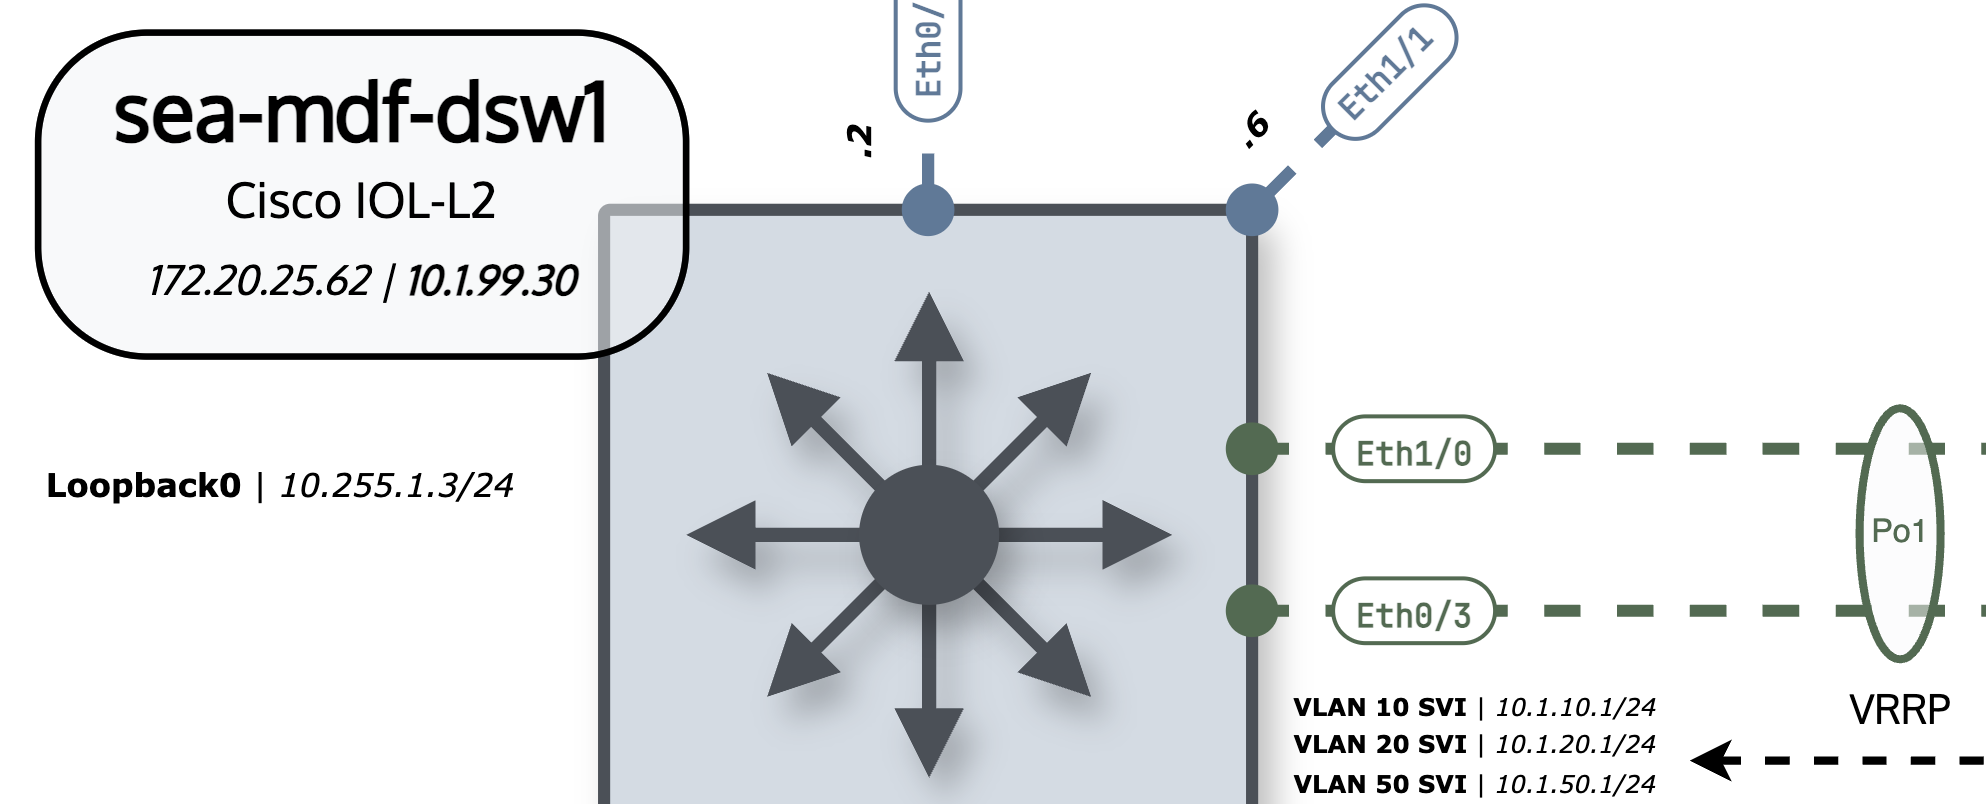
6. Emulated networks like these can be buggy at times and certain things that may not work exactly like they do on a physical device. If your network isn't working how you think it should it's probably still your fault, but know these things can get goofy sometimes.
Container Versions
The YML files reference an image and version for each container as image: vrnetlab/cisco_iol:17.15.01. You can use a different version of cEOS or Cisco IOL than is referenced in the lab files, but you'll need to change the version tag for every device in the YML file before you deploy.
Let's say when you convert your Cisco IOL image to a container using vrnetlab it's now 17.15.02. Change that tag on every Cisco IOL device in your lab YML file.
sea-mdf-r2:
    kind: cisco_iol
    mgmt-ipv4: 172.20.25.65
    image: vrnetlab/cisco_iol:17.15.01
Failing to match the container versions in the YML file with the containers in your Docker install will cause your lab not to launch.
#
What You'll Learn
By the end of this series, you'll have experience with:
- VLANs and trunking
- Static and dynamic routing (OSPF)
- GRE and IPsec tunneling
- Basic network services (NAT, DHCP, DNS)
- Linux-based host tools and troubleshooting